
Advertisements
Although it’s the age of styling irons now, we still find pin-curling very appealing. For one you avoid the issue of heat damage to your hair and additionally pin curls can give you a luscious and more natural vintage look instantly.
Just recall the hairdo of Dita Von Teese or Rachel McAdams in The Notebook, aren’t they both charming and flirtatious? For those girls who want to do pin curls at home, we have broken down the steps in a very simple tutorial. If you still want a video tutorial after reading this, we have also prepared one on the last page.
Then, Let’s PIN it!
Step 1: What You Need
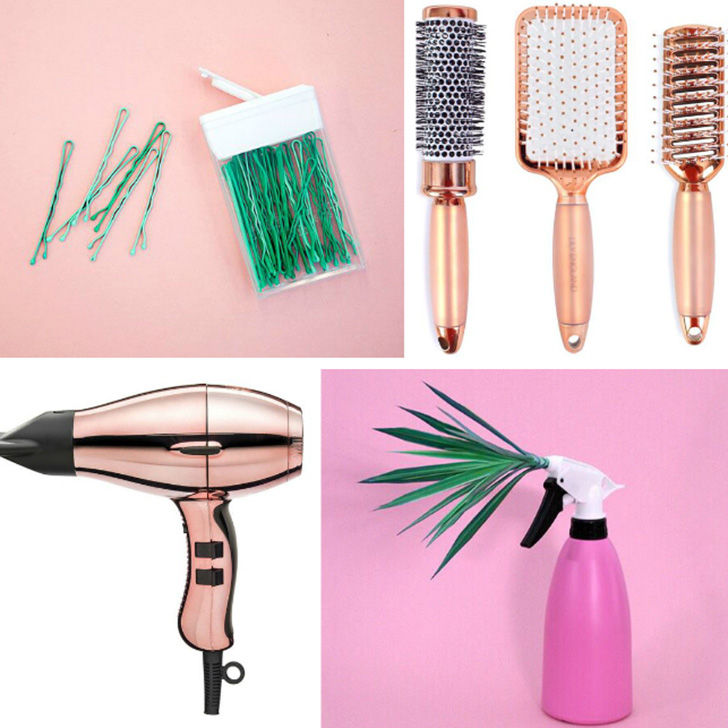
1. Bobby pins or duckbill clips, they work basically the same.
2. A brush or comb.
3. A spray bottle of water, in case your hair dries out when you are still working with the pins.
4. A blow dryer, or if you want to sleep on it overnight, then ditch the blow dryer and prepare a silk headscarf.
5. Other stuff, such as hair balm, setting lotion or pomade, are optional.
Advertisements
Step 2: Damp Your Hair, But Not Too Wet Or Too Dry
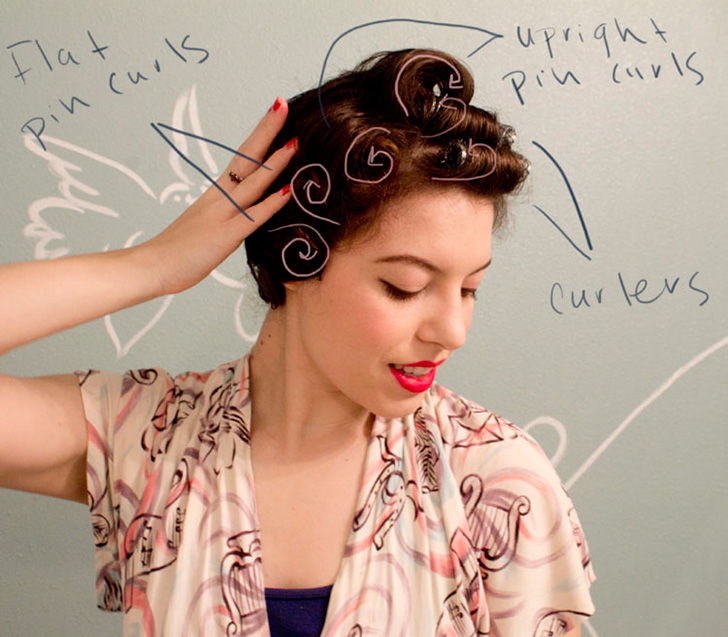
Comb your hair first to get rid of all the tangles, and section it with your fingers. The size of the lock of hair depends on how you design it. But remember, if the strand is too much, the pins will not be able to fix the sets. If the strand is too little, you might not have enough room on your head to afford all the curls. Blogger Solanah (vixen-vintage.com) makes a perfect example for us in her pictures.
Step 4: Roll A Pin Curl
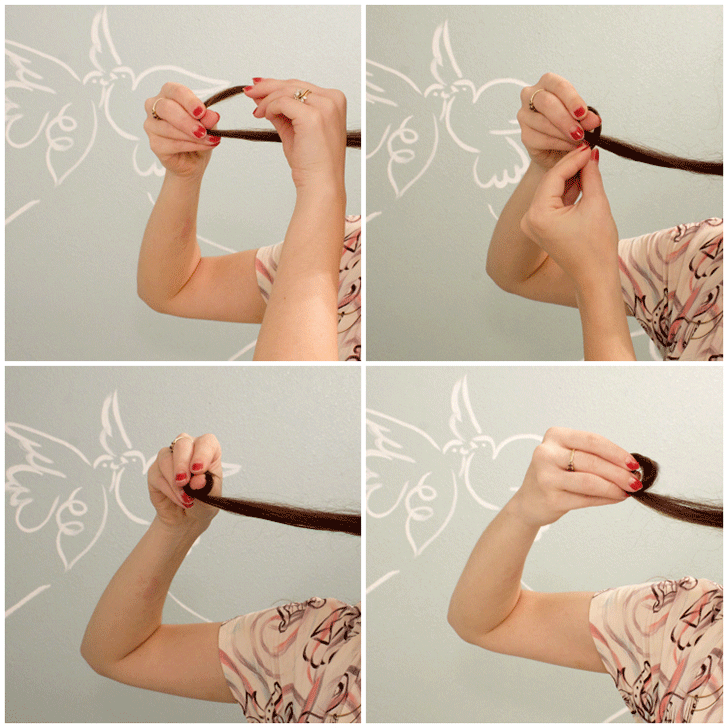
Start from the end of a strand of your hair, loop it around your thumb and roll it to the root. Then secure the hair circle with two bobby pins, making a criss cross over the circle (or use one duckbill clip for the same effect). Repeat this move with your other locks of hair.
Step 5: Let It Dry Out
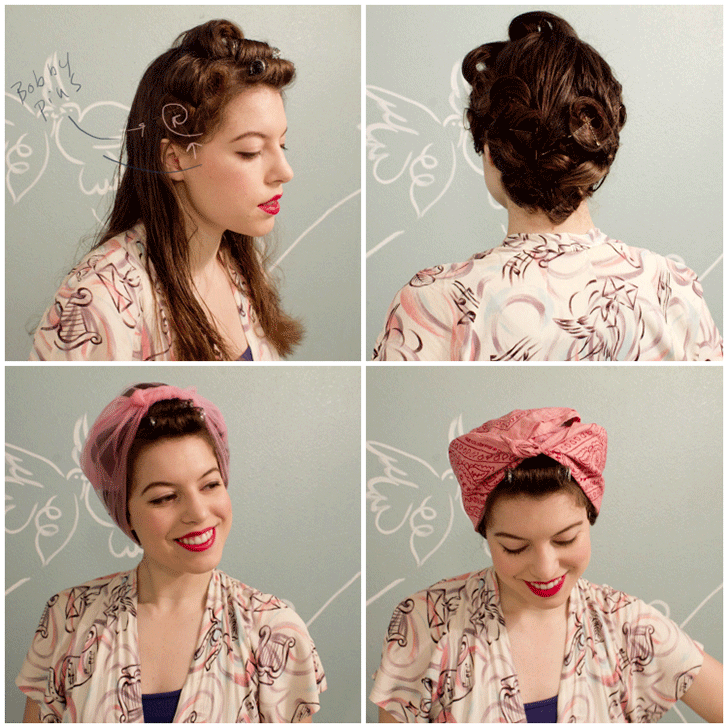
It’s time for you to wait now. You could blow dry all the curls, or just wrap a silk headscarf over your head and sleep on it. If you choose the latter one, don’t forget to take selfies because you are going to look so vintage with the scarf on LOL. Make sure your hair is completely dry before you move to the next step.
Step 6: Loosen Up
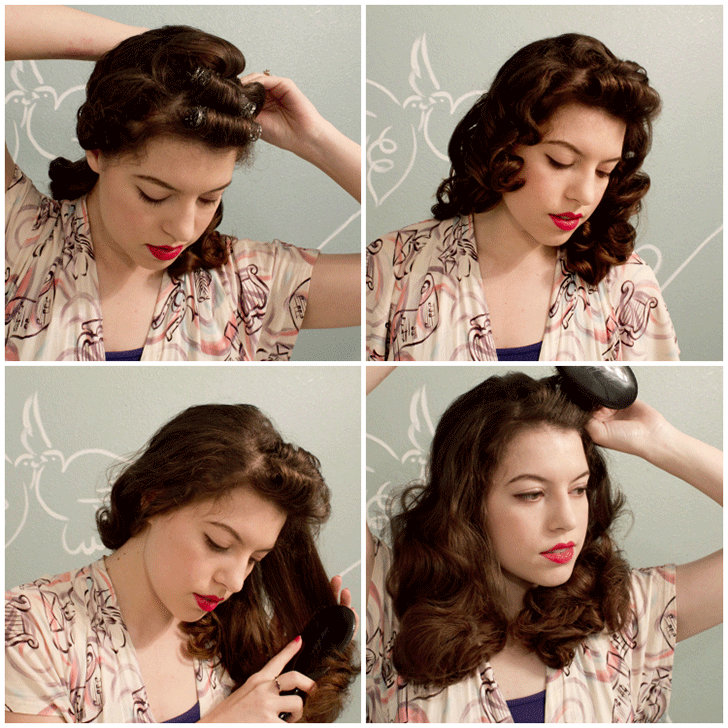
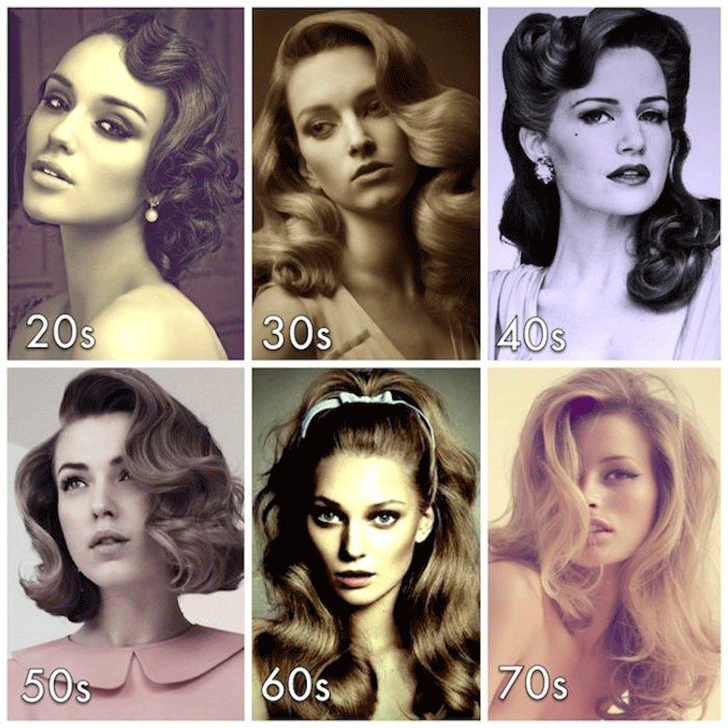
Once dry, unpin all the curls slowly, then loosen up it with your fingers. You can also brush it, and apply a bit pomade to smooth the frizz on your hair. Congrats! You’ve done it. With this easy tutorial, you can pin all the curling style from 1920s’ to 1970s’, no matter you have long or short hair. We’ve collected some classical styles for your consideration on the next page. And don’t forget the video tutorial on the last page.
1920s’ To 1970s’
Advertisements
Comments